Step-by-Step: Installing Custom Ceiling Drapes for a Luxe Look

Adding ceiling drapes is a chic, sophisticated way to elevate any room, creating a luxurious atmosphere that impresses. Ceiling drapes, especially custom ones, are not only perfect for events like weddings and parties but also for adding a unique, cozy vibe to any space at home. This guide will walk you through how to install custom ceiling drapes, the tools you’ll need, and the best practices for a professional finish.
What You’ll Need
To begin your ceiling drape project, gather these essentials:
Custom Ceiling Drape Fabric: Choose a fabric that matches the ambiance you want to create. Lighter, sheer fabrics create a soft, airy look, while heavier fabrics add a bold, statement feel.
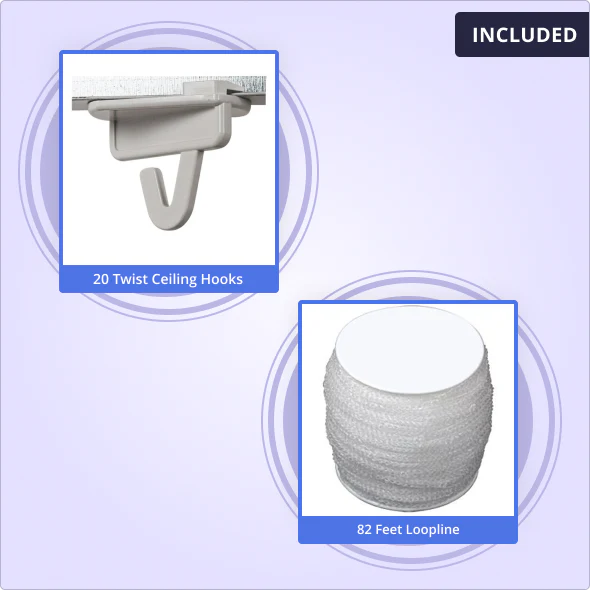
Ceiling Drape Kits: These kits often come with adjustable rods, brackets, and screws, making installation easier.
Measuring Tape: Accurate measurements are key for a perfect fit.
Drill and Drill Bits: Essential for installing the drape brackets.
Ladder: Depending on your ceiling height, you may need a tall ladder for safe installation.
Curtain Rings or Clips: These can add flexibility if you want to adjust the height or drape.
Step 1: Measure Your Space
Begin by measuring the ceiling area where you want the drapes to hang. Use your measuring tape to determine the length and width.
Pro Tip: Measure a few inches wider and longer than your initial estimate to ensure full coverage. This will prevent gaps and allow the drapes to flow naturally for a luxurious appearance.
Step 2: Choose Your Mounting Style
Before drilling, decide on how you’d like the drapes to hang. Here are some popular mounting styles:
Swag Style: For a soft, flowing look, swag the drapes from multiple points across the ceiling. This style adds visual movement and works well in larger spaces.
Straight-Line Hanging: If you prefer a sleek, modern look, install the drapes in straight lines from one end of the ceiling to the other. This is ideal for narrow spaces or as a backdrop.
Circular Canopy Style: Ideal for bedrooms, this style is achieved by arranging the drapes in a circular or semi-circular pattern, often above a bed or a sitting area, creating a cozy, canopy-like effect.
Step 3: Mark Bracket Locations
Using your chosen style, mark where you’ll install the brackets for your ceiling drape. For the swag and canopy styles, evenly spaced brackets will help create a balanced look.
Tip: If using a Ceiling Drape Kit, refer to the instructions for optimal spacing and placement. Many kits include adjustable brackets that make the hanging process more straightforward.
Step 4: Install the Brackets
Using your drill, install the brackets according to your markings. Ensure they’re firmly attached, as ceiling drapes can weigh more than traditional wall-mounted curtains. Double-check the brackets for stability, especially if you’re using a heavier fabric.
Safety Note: Ensure that the screws are appropriate for your ceiling type. For plaster or drywall ceilings, consider using anchors to prevent the brackets from pulling loose.
Step 5: Attach the Drapes
With your brackets securely in place, attach your custom ceiling drapes. You can use curtain rings, clips, or loops directly on the rod. Ensure the fabric is evenly distributed across each bracket to maintain a balanced appearance.
Swag Style: If you’re going for a swag effect, loosely drape the fabric over each bracket, allowing it to dip between each point.
Straight-Line Hanging: Pull the fabric tight between each bracket to maintain a sleek, uninterrupted line.
Circular Canopy Style: Gather the drape fabric at a central point or in a semi-circle for a flowing canopy effect.
Step 6: Finishing Touches
For an extra luxe look, adjust the drape folds until they’re even and symmetrical. If you’re using a sheer fabric, consider adding fairy lights behind the drapes for a soft, glowing effect.
Additional Tips for Hanging Curtains from the Ceiling
Layering: For a fuller, more dramatic look, consider layering multiple drapes. Combine different textures or colors to add depth.
Ceiling Height: If you have a low ceiling, avoid overly heavy or dark fabrics, as these can make the room feel smaller. Instead, use light or pastel colors and sheer materials to open up the space.
Room Purpose: For bedrooms, a canopy ceiling drape can add a romantic feel. In a living room or dining area, ceiling drapes provide a chic ambiance and help define the space.
Conclusion
Installing custom ceiling drapes is an effective way to bring elegance and personality into any room. With the right tools, a Ceiling Drape Kit, and careful planning, you can create a stunning effect that elevates your space. Whether you’re transforming your home or preparing for an event, this step-by-step guide will help you create a ceiling drape installation that’s both stylish and professional.


Comments
Post a Comment